Array
(
[0] =>
[1] => developer
[2] => web-sdk
[3] => reactjs-integration
[4] =>
)
Follow the Below steps to start Integrating the GluedIn WebSdk in ReactJS application.
Step 1: Install Node.js and NPM
Before you can start with ReactJS Web app, you need to install Node.js and NPM on your system. Node.js is a JavaScript runtime environment, and NPM is a package manager for Node.js. You can download and install Node.js and NPM from the official website:
https://nodejs.org/en/download/
Step 2: Download the ReactJS Web Sample app
To download the ReactJS Web sample app from
here
Step 3: Unzip the sample and open in VS Code or any IDE
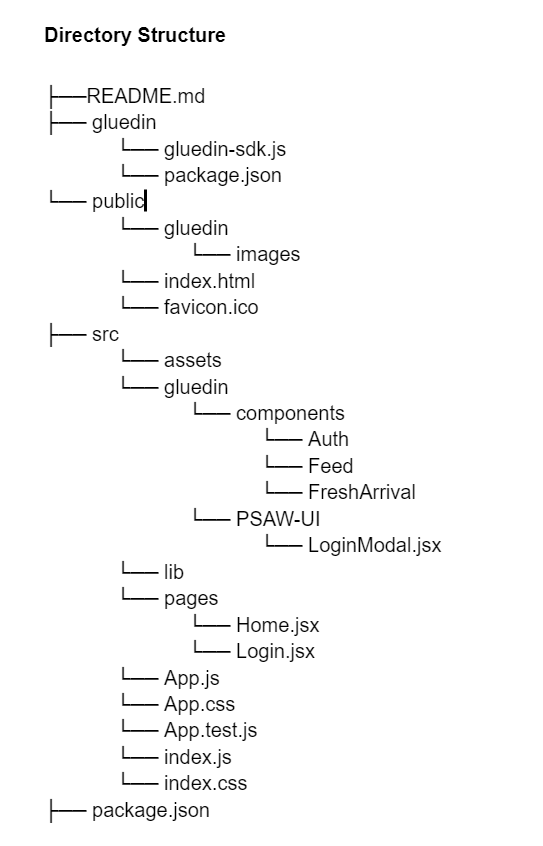
Once unzipped below is the directory structure of the sample application.
- README.md: This file contains the documentation for the project.
- package.json: This file contains the Web app configuration, dependencies, and scripts.
- gluedin: This directory contains the SDK methods and services that are called from Web app components.
- public/: This directory contains the public assets of the Web app, such as HTML, images, and icons.
- src/: This directory contains the source code of the Web app.
Step 4: Install the ReactJS Web app on Local
To install the dev dependencies for the web app, navigate to the project directory in your terminal or command prompt and run the following command:
npm i
This command will create a new directory in the Root directory of Web app with the following name:
node_modules/: This directory contains all the dependencies installed via NPM.
Running the Web app
To run the Web app, navigate to the project directory in your terminal or command prompt and run the following command:
npm run start
This command will start the development server and open your default browser to http://localhost:3000/. You should see the Web app home page.